Transfer everything from old computer to new computer with Windows 11
Transfer programs and files to new computer
Transfer files from one computer to another
Transfer Microsoft Office to new computer
Restore programs and files from a broken or dead computer
Transfer directly from an old hard drive
Transfer to new computer using a USB hard drive
Corporate Windows 11 migration
User Profile Migration to new PC / new domain
How To Migrate Local Profiles to Azure AD
Migration to Server 2019 / 2016
Transfer programs and files to new computer
Transfer files from one computer to another
Transfer Microsoft Office to new computer
Restore programs and files from a broken or dead computer
Transfer directly from an old hard drive
Transfer to new computer using a USB hard drive
Move To New PC - Compare Options
Migration Kit Pro - Advanced Transfer
Transfer programs and files to new computer
Transfer files from one computer to another
Transfer Microsoft Office to new computer
Restore programs and files from a broken or dead computer
Transfer directly from an old hard drive
Transfer to new computer using a USB hard drive
In this article, we will see how to transfer to new PC that has an SSD drive for Windows and programs, and additional storage for data. The transfer will preserve your programs, settings, documents, pictures, music, movies, favorites, wallpaper and the rest of your stuff, transferring to a Windows 11, Windows 10, Windows 8 or Windows 7.
The goal in this transfer is to perform it in such a way that programs go to the SSD drive, and data goes to the Data drive. This way, you get to have the performance boost of the SSD, while still keeping all of your stuff from the old computer (even though it would not fit into the SSD alone).
The tool we have to use here is Zinstall Migration Kit Pro. It includes a dedicated SSD mode, which is made exactly for this scenario. In that mode, the Kit will automatically assign programs and their settings to the SSD, and the rest – to the data drive. Let’s see how the process works.
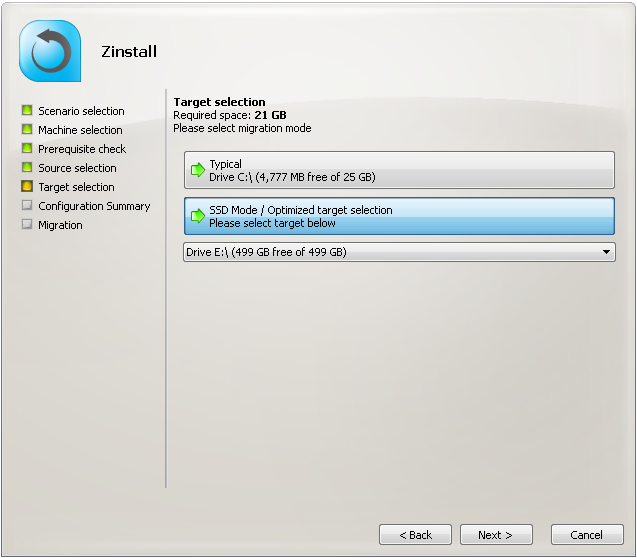
That’s it! Migration Kit Pro will perform the transfer, splitting the transferred stuff between the SSD and the data drive, automatically.
Ready to transfer to your new SSD-based computer?