
Need a solid backup for your Server 2019, 2016, 2012 or 2008 R2?
Backblaze B2, combined with solid client-side software, is a great way to cover your bases and be able to recover everything in case of a disaster.
In this article, we’ll learn how to set up a full backup of your entire server to Backblaze B2 Cloud storage. Not just files – we are talking about being able to recover the entire server, including installed software, its settings, profiles, accounts, shares and data.
Backblaze B2 is a relatively new option on the Cloud storage market. Backblaze itself is, of course, is one of the more popular Cloud backup options. With B2, Backblaze finally opens up its backend storage for bulk use, Amazon-style. While B2 implements essentially the same API as Amazon S3, its main advantage is that B2 is significantly cheaper. Of course, in itself, B2 is not a backup solution; it is a Cloud storage platform. Now, let’s use that as a foundation for a bulletproof server backup.
This tutorial demonstrates how to use a combination of Backblaze B2 and dedicated server backup software to backup a Windows Server to Backblaze B2, to automatically protects your entire server, and – more importantly – to restore your entire server in case of disaster.
Further down the line, we’ll cover how to setup a hybrid backup, so that you both backup your server to Backblaze, and also stored a copy on your local storage – thus complying with the 3-2-1 rule of data protection (at least 3 copies, in at least 2 locations, with at least 1 off-site).
Of course, incremental backups are performed automatically: you don’t need to “babysit” your backup or to manage backup schedules and backup windows.
Most importantly, when disaster strikes, you can restore even to a completely different replacement server, even to different Windows version, even to different infrastructure (such as a Cloud-hosted replacement server) – including applications, DBs, settings, profiles, shares and all data.
Let’s get started.
To set up the backup, you will need two things – access to Backblaze B2 storage, and backup software.
Here is what you need to do, in a nutshell (more details are available below):
So what happens now?
Zinstall FullBack Server will first make a full backup of your Windows Server. It will be safely stored in your Backblaze B2 Cloud Storage.
This part takes a while, of course. The exact duration of “a while” depends on the amount of data on the server, and your upload speed.
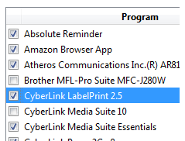
Once the initial backup is complete, it will keep backing up any changes that happen on the server. So if you change a file, or install a new application, your backup will be updated accordingly. This is all done completely automatically. In fact, you probably won’t even feel it running.
Using a combination of file- and sector-based introspection, FullBack is quite efficient in handling just the changes that happen, and even protects the hard drive’s health, by minimizing the amount of I/O operations involved (this makes the drive live slightly longer). For example, if one of your users has a 10GB PST stored on the server, and causes 10MB worth of changes, the actual upload for that will be very close to 10MB – not the entire 10GB.
Of course, the real reason you have a backup is the restore part. How do you restore a single file that got misplaced? And how do you restore everything, including applications, if the server crashes? Read on to find out.
So one of your users was working on an important document, and now it’s gone for no apparent reason. If that document was stored on the user’s server-side share, fear not – that’s exactly why you have set up an automatic backup of your entire server! Here is what you do:
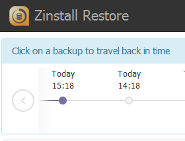
That’s it – your file is back and unharmed.
Don’t panic! You have a backup.
You will first need to determine where you are restoring that backup to. This could be a replacement physical server, a replacement virtual machine, a Cloud-hosted server (such as Backblaze’s own EC2), or – if the original server’s hardware is intact – the same server you’ve had before, with a fresh hard drive.
The first step you have to do is to install Windows on the target server. With a FullBack Server Pro restore, you can choose to install a completely different Windows version. Even if the original server was, for example, Server 2008 R2, you can restore it to a Server 2019 deployment.
Once Windows is installed (and joined to your domain), you can proceed with the restore.
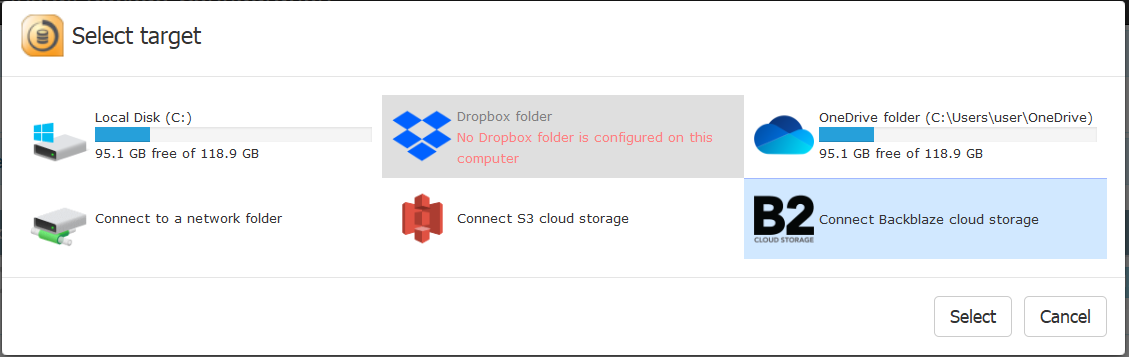
To do that, install Zinstall FullBack on the replacement server. Select your Backblaze B2 as backup source, and follow the prompts for complete restore. When finished, just restart the server, and you’ll see all the applications, settings and files from your crashed computer.
What does not get restored?
While FullBack Server Pro is able to restore applications, settings, profiles, shares and all data, there are some things that it will not be able to recover automatically. Here is what is not restored:
What if you want to restore not to a physical server or local VM, but to a Cloud server instance – can that be done?
The short answer is “yes”, although there are some caveats to consider.
In terms the restore process itself, it is pretty much identical to restoring to a local server. Install Windows, run through the FullBack Server Pro restore process, get your apps and data back, make the final adjustments you need.
The main caveat compared to local server is going to be connectivity. Your Cloud server is not automatically accessible from your network and is not automatically connected to your domain, so you will need to bridge the gap using SDN or VPN, and to make sure that your client machines are able to communicate with the new server.
With that said, restore to Cloud allows a truly fast recovery, without spending time on installing a local replacement, and works even if you do not actually have a local replacement. Plus, even if you do not have an immediate connectivity solution, sometimes just having the server available and running on the Cloud, with access to its data and environment, far outweighs the connectivity inconveniences. This is certainly something to consider.
Great! You now have a solid Cloud backup of your Windows Server. Are we done?
On one hand, you are very well protected at this point. Backblaze Cloud storage is best in class, and includes protection from hardware failure or software failure, which is transparent to you as a the client. However, for a truly complete backup, it is generally recommended to follow the 3-2-1 rule: 3 copies of your data, stored in 2 locations, 1 of them off-site.
You currently have 2 locations (your server and Backblaze), with one off-site (Backblaze). Luckily, FullBack Server allows you to comply with the 3-2-1 rule by adding another backup target, independent of your Cloud backup.
Typically, the local backup would use local network storage (NAS / SAN). You could of course use other options as well; any storage where you can store files and have enough space, can be used as your additional backup target.
Another important benefit of using this kind of hybrid backup approach (on-premise + off-premise) is speed. In most recovery scenarios, your local backup is alive and well (as opposed to situations when you must have an off-site location, such as fires, floods etc.) It is much faster to restore from local storage than from the Cloud; having a local backup will allow you to be even more efficient in your restores, without sacrificing the resilience you get with off-site Backblaze B2 backup.
Hybrid backup is really the best of both worlds.
Backblaze B2 is one of the best Cloud storage solutions on the market, certainly when you take its cost/benefit ratio into account. By using FullBack Server Pro and Backblaze B2 together, you get a complete, automatic, always-on Cloud backup of your entire Windows Server, including all programs, settings and files.
It is extremely easy to set up. You do not have to connect any equipment to the server itself, or even remember that you have a backup. It is all automatic.
And when you accidentally delete a file, or when your server crashes, you will be able to recover efficiently and completely – and will thank yourself for taking the right precautions well in advance.
Get a free trial of Zinstall FullBack Server here